Overclocking is a process of increasing the clock speed of a computer component, such as the CPU or GPU, beyond its factory settings. This can improve performance but also lead to instability and overheating. If you are not careful, overclocking can also damage your hardware.
To stop a CPU from overclocking, you have to reverse all the initial changes you made in your system settings. You can do this by entering the BIOS menu on your computer, which is the same route you use to overclock your CPU. Afterward, return all the settings to normal.
While overclocking can give you a significant performance boost, it can also lead to stability issues and shorten your CPU’s lifespan. If you’re not careful, you can also damage your CPU.
This article will guide you on easily disabling overlocking using BIOS & also Windows settings on Windows 11/10/8/7. So, let’s take a look.
How to Check If CPU Is Overclocked?
You can check whether your CPU is overlocked using a couple of methods. Here, we have explained these two methods to check whether your CPU is overlocked easily.
Method 1: Checking the BIOS Settings
Like checking a dashboard in a car, you can see how your computer’s brain (CPU) is doing by looking in the BIOS menu. You can find out if the CPU is working too hard by checking power and output.
You can also look at numbers like CPU core ratio and voltage. If they’re too high, the CPU works extra hard. It’s like looking at a car’s dashboard numbers to know if the engine is going too fast.
Method 2: Using a Freeware
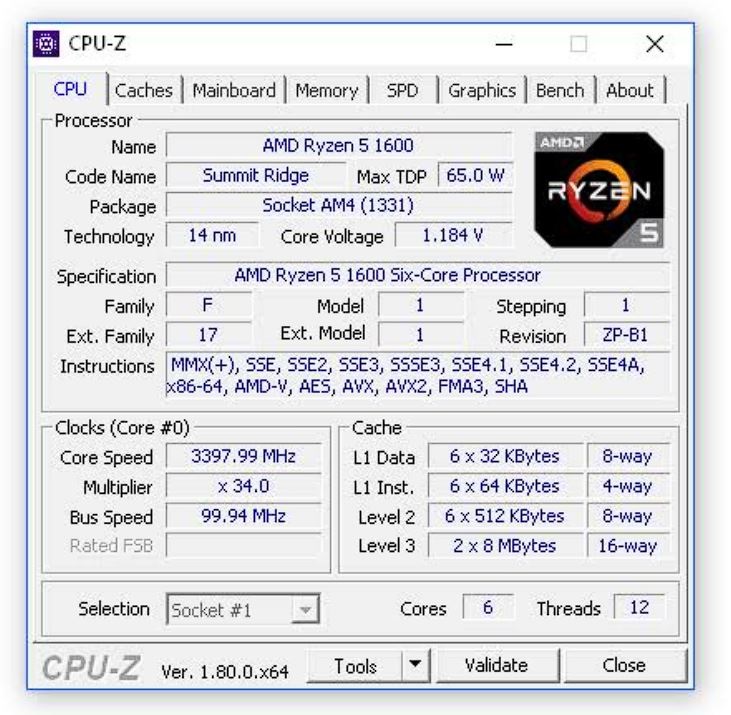
CPU-Z is a free-to-download program that allows you to check how fast your CPU works. You can gauge whether your system is in overclocking mode by looking at the speed.
Step 1: Download and install the CPU-Z software.
Step 2: Run it as an administrator.
Step 3: If your PC is overclocked, it will show that the CPU speed is much higher than the default value.
Is Overlocking Bad for your CPU?
Overclocking means making your computer work extra hard, but not all computers can handle it. Some can get ruined quickly because they’re not built for it.
The main problem is that it gets really hot when you make your computer work faster. Even with normal speed, it makes a lot of heat, but overclocking makes it way hotter. If your computer can’t handle this extra heat, the main part called the CPU, can get damaged very quickly.
Some companies don’t want you to overclock because it can break your computer, and you might lose the warranty. Even if you try overclocking, it doesn’t always make your computer work much better. So, it’s like taking a risk; sometimes, it doesn’t pay off.
Can You Break a CPU By Overclocking?
Making your computer work extra hard (overclocking) can break the main part called the CPU, especially if it’s used a lot or not set up right. Overclocking needs a lot of power and makes a ton of heat. If your computer doesn’t have enough power or a good cooling system, it can get messed up and not work properly.
If you’re not careful, the inside of the CPU can get damaged without you even knowing. Also, if you leave the CPU working extra hard for too long, it can break permanently, and you might only realize it when you use your computer next. So, it’s essential to be careful with overclocking!
Is Overclocking Safe for your CPU?
Overclocking your CPU can cause a bunch of issues. The main one is it might make your CPU get too hot, causing problems and possibly damaging it. Another issue is that your computer’s other parts, like the motherboard and RAM, might not keep up with the faster CPU, leading to slower performance and even crashes (BSOD).
Plus, overclocking can make your CPU not last as long because it gets hotter, which can damage it. So, if you want your computer to stay healthy for a long time, it’s better not to overclock.
How To Stop/Disable CPU Overlocking on Windows 11/10/7
You can use different methods to stop CPU overlocking. However, we use two methods to disable CPU overlocking. So, let’s dive in;
1. Entering the Bios
First & foremost, you have to enter the BIOS option or the UEFI (for the later generations of Windows).
To access the BIOS menu, you need to follow the below steps;
Step 1: Press a specific key during the boot-up (starting) process. Usually, you will see a message displaying what key you need to press, such as “Press DEL to enter setup” or something similar.
Step 2: Standard keys for entering BIOS are DEL, F1, F2, etc.
To access the UEFI screen, follow these instructions:
Step 1: Click on Settings < Click on Windows Update & Security < Click on Recovery < Scroll Down, and Click on Restart.
Moreover, hold down the “shift” key and then select restart from the power button option. The computer will restart and give you a unique screen with different options.
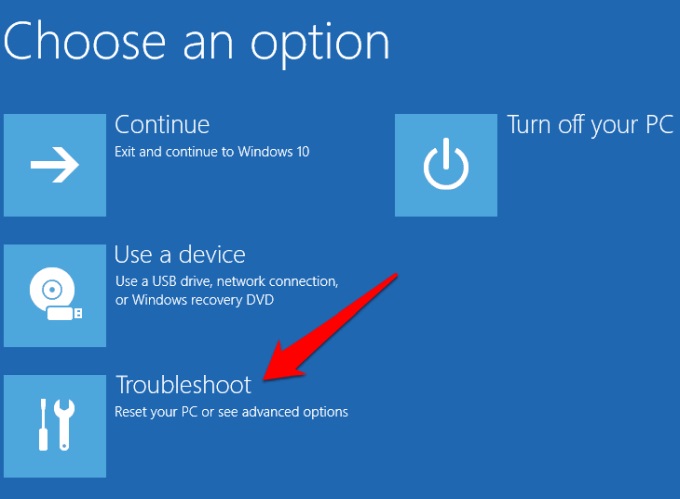
Step 2: Go to “Troubleshoot”.
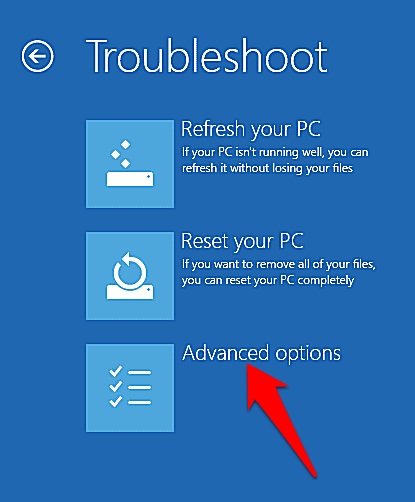
Step 3: Go to the “Advanced Options” tab.

Step 4: You will find the option for UEFI settings.
Method 1
If your computer has a direct option that you can use to turn the overclocking feature on and off, you can use this method.
Step 1: In the BIOS (or UEFI) menu, go to the “Advanced” tab.
Step 2: Go to “Performance”.
Step 3: Look for an option that specifies overclocking or something similar.
Step 4: If it is enabled, which should be the case if your CPU is overclocking, then disable it.
Step 5: Save the settings and press “YES” to any confirmation dialogue box.
Step 6: Exit the BIOS menu and restart your computer system.
Method 2
Now, even if your computer does not have a direct option for you to try, there is still a way. Once again, you must go to the BIOS menu to achieve this.
Step 1: In the BIOS menu, you will see an option for “CPU core ratio”, where you will see each of the individual cores and how they are running. Reverse all the changes made here back to their normal settings.
Step 2: The “CPU core voltage” option determines the amount of power supplied to the CPU to sustain overclocking. Return this to normal as well.
Step 3: You can also select the “restore fail-safe defaults” option and return all the settings to their factory standard.
Step 4: Reverse any changes you made to the FSB frequency settings. You could avoid overclocking in older models without changing the FSB frequency. But in most modern computer systems, you have to.
Step 5: Save the changes.
Step 6: Exit the BIOS menu.
Step 7: Restart your PC.
2. From Windows
The easiest way of turning off overclocking on your PC is by changing the power settings on Windows. To do it, follow these steps.
Step 1: Go to Settings > System > Power & Sleep.
Step 2: Click the ‘Additional power settings‘ button on the right.
Step 3: Under ‘Preferred Plans,’ ensure the ‘High performance‘ option is checked. Then click on ‘Change plan settings‘ on the right.
Step 4: Click ‘Change advanced power settings‘ at the bottom.
Step 5: Look for the ‘Processor power management‘ option on the menu and expand it.
Step 6: Expand the ‘Minimum processor state‘ and ‘Maximum processor state‘ options.
Step 7: Now change both values from 100% to 99%.
Step 8: Click ‘Apply‘ and Select ‘OK.’
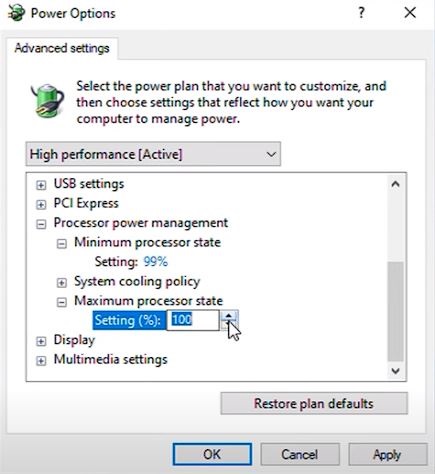
This will turn off the overclocking on your CPU.
We are attaching the video if you still can’t understand how you can easily stop your CPU from overlocking. By watching it, the idea will be clear;